Global Admins are allowed to add authentication URLs for organizations, so that users can log in via SSO (Single Sign On).
To configure SSO authentication URLs:
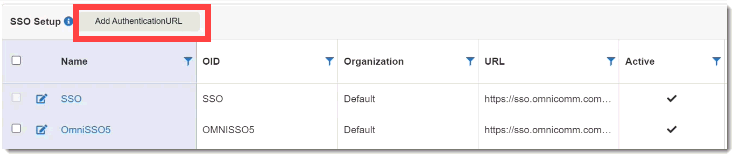
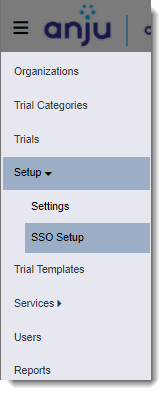
1. Go to Setup > SSO Setup.
2. Click the Add Authentication URL button in the SSO Setup page.
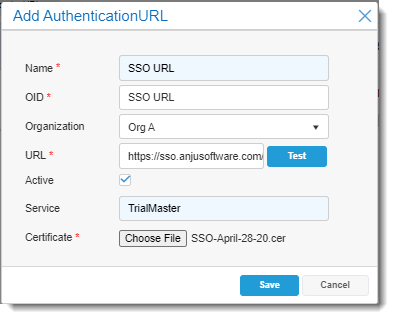
The Add
Authentication URL dialog displays. To expand the
Description field, drag the  icon.
icon.
3. Do the following to complete the dialog:·
· Name – Any desired name, for example ANJU_ADFS or ANJU_Okta.
· OID – Automatically populated based on the name.
· Organization – Select the organization from the drop-down.
· URL – Enter the URL, for the identity provider. Click the Test button to ensure the URL works properly. Examples:
o For AD FS, enter https://sso.anjusoftware.com/adfs/ls
o For OKTA, enter https://anjusoftware.okta.com/app/anjusoftware_trialmaster_1 /exkdxpz9pGXl2coA0356/sso/saml
 Note:
These are just examples. Get this information from your IT department.
Note:
These are just examples. Get this information from your IT department.
· Active – automatically checked (if unchecked, URL is not active)
· Service – TrialMaster (This is just an example. Get this information from your IT department.)
· Certificate – Click the Choose button to browse and select the SSO certificate. (Check with your IT department for the certificate.)
· Click the Save button. A confirmation message displays at the top of the page and the new setting displays in the table.
4. To enable SSO, go to the Settings page and select Yes for the Enable SSO setting. (See Edit SSO Settings for guidance.)